101
Related Articles


At The Orderly Space, there is no denying our love of a good pantry organizational overhaul! It could be because we are all a bit food obsessed or perhaps it’s because we know the value of a thoughtfully designed pantry system, but either way, we are here to break down step-by-step how we approach every pantry project.

Photo Credit: Kelsey Kurtis

1. Empty everything out. Yes, every single item! You know that phrase, “It gets worse before it gets better”? Well, that’s about to happen. As items are pulled out, group them into categories, check expiration dates, and toss anything that seems questionable.
2. Now it’s time to shop! Replace items that were expired and restock all the essentials. We want to create systems based on your max capacity! Nothing is worse than coming home after clearing the aisles at the store to find that your newly created systems can’t handle the influx of items. Once fully stocked it’s time to get to business!


3. Give your pantry a thorough wipe down and vacuum. We want a fresh, clean start!
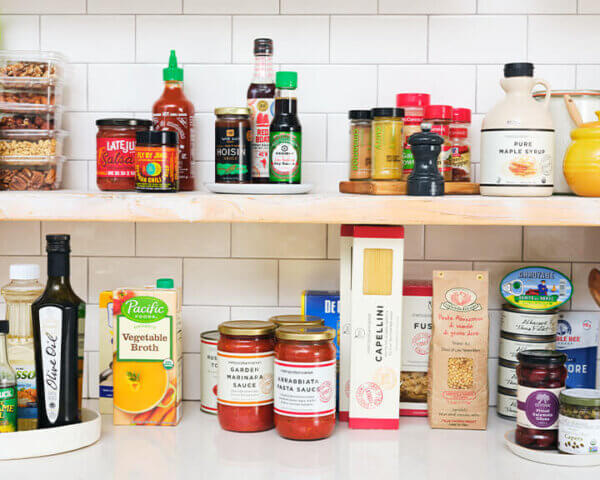
4. Product is power! There is a reason our professional organizing team comes to every session equipped with bins, turntables, risers, and canisters. Product placement is essential to the overall functionality of your space. We use turntables on hard-to-reach shelves and corners, baskets to contain loose packages of items, and canisters to decant dry goods like flour, sugar, rice, and pasta.

Photo Credit: The Orderly Space

Photo Credit: The Orderly Space
5. As you return items to your pantry, consider what your household uses most often and allocate the prime real estate space to these categories. Lesser used items are going to be the least accessible (think up high and down low). We also like to group categories together similar to how you would find things as you walked the aisles of the grocery store:
- • Zone 1: Bread, spreads, breakfast, coffee, tea
- • Zone 2: Canned goods, sauces, condiments, dinner items
- • Zone 3: Snacks, chips, crackers
- • Zone 4: Baking, sweets, treats
6. Once items are organized into categories, it’s time to label. Like it or not, labels help everyone in your household follow the same system which is key to long-term maintenance.
Stick to broad categories that can easily accommodate a variety of items over time. For example: Dinner, Snacks, Breakfast, Sweets.

Photo Credit: Kelsey Kurtis
Tips to maintaining your organized pantry:
- Always shop your pantry first. Make grocery lists based on what categories are low. If your bin of pasta is overflowing – no buying more until you have the space to accommodate more!
- Remove individual items from their bulky packaging. Not only will this take up less space, but it’s easier to see exactly how many granola bars you have on hand when they aren’t concealed in a box.
- Don’t put it down, put it away. It takes just as much effort to put an item back in its correct place as it does to set it where it doesn’t belong.
- Get the kids involved! Age-appropriate tasks like refilling cereal canisters or taking items out of the packaging are great ways for kids to have ownership of the space and contribute to the continued efficiency of the systems.